Buffalo - WZR2-G300N (Buffalo Firmware)
Wireless Setup Guide
Note: When setting up or changing your wireless settings it is a good idea to
be plugged into the router with your network cable and not your wireless
connection.
If you are using your
wireless connection and make any changes you will lose you wireless connection.
Step 1.
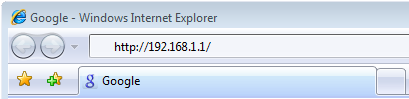
Open your favorite web browser and input your routers ip address in the address bar.
Please note that you must have the http:// in order to connect to your
router/modem properly.
Need help finding you router IP address? Click here
Step 2.
Some router/modems require a username and/or password, if yours requires it, enter the routers username and password here.

If you don't know it you can check our list of default router and modem password list here.
If you have changed it and don't remember it you may have to reset your device to factory default using the reset button on most routers.
Step 3.
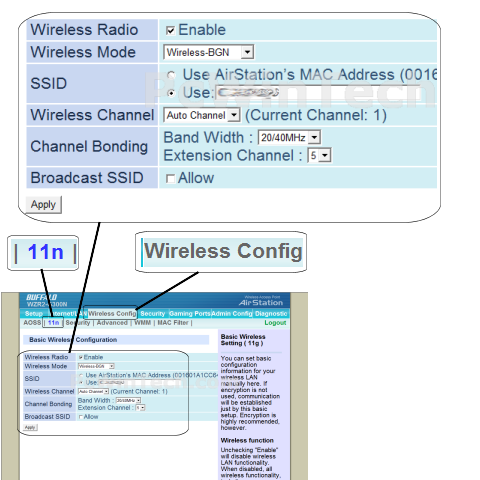
Once logged into your router click on "Wireless Config".
Wait until the page finishes loading.
Click on '11n'
Wait for the page to finish loading.
For 'Wireless Radio' put a check on 'Enable'
For 'Wireless Mode' choose 'Wireless-BGN'
For 'SSID' set a name you would like to call your
wireless.
What you put here is what will show up when you are searching for a wireless
connection.
For 'Wireless Channel' choose 'Auto Channel'
For 'Channel Bonding' you can leave these at their defaults.
For 'Broadcast SSID' put a check on 'Allow'.
This will broadcast your wireless connection to be detected by your wireless
card.
This is a good way for a standard user to find the network, but also why it is
important to have wireless security in place.
Click 'Apply'
Step 4.
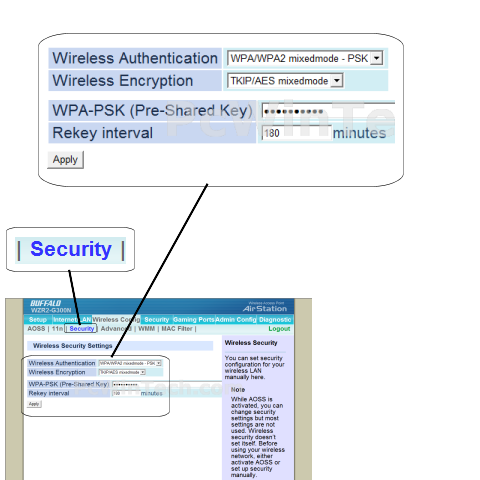
After you have applied the settings from step 3 click on 'Security'
Wait for the page to load.
For 'Wireless Authentication' Choose 'WPA/WPA2 mixed mode - PSK'
For 'Wireless Encryption' choose 'TKIP/AES mixed mode'
For 'WPA-PSK (Pre-Share Key)' enter a password of you liking, min 8 chars.
Click 'Apply'
All done!

