Port Forwarding - D-Link - DSL-2540B (D-Link Firmware)
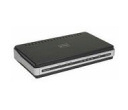
D-Link - DSL-2540B (D-Link Firmware)
 
Port Forwarding Guide
For automatic port forwarding try Simple Port Forwarding

Step 1.

Some routers & modems work best with port forwarding if you have a static local IP.
Manually set your network interface card ( NIC ) to use a static ip address.
You can also download my FREE Simple Static IP tool to set it for you.

Step 2.

Open your favorite web browser and input your routers ip address in the address bar.
Please note that you must have the http:// in order to connect to your router/modem properly.

Need help finding you router IP address? Click here

Step 3.

Some router/modems require a username and/or password, if yours requires it, enter the routers username and password here.

If you have changed it and don't remember it you may have to reset your device to factory default using the reset button on most routers.

Step 4.

Once logged into your router click on "Advanced"

Once the page has loaded click on "Virtual Server"

Once again wait for the page to load and click "Add"


Click To View Full Picture

Step 5.

Next select "Custom Server" and give your entry a name.

Enter the computers IP address in "Server IP Address"

In "External Port Start" enter the starting port to be forwarded.
Example: 2100

In "External Port End" enter the ending port to be forwarded.
Example: 3100

Next choose the "Protocol"

In "Internal Port Start" enter the starting port to be forwarded.
Example: 2100

In "Internal Port End" enter the ending port to be forwarded.
Example: 3100

Click on "Apply"

Repeat step 5 for any more ports you want to forward.

Again click on "Apply"

All Done!


Click To View Full Picture

Port Forwarding - D-Link - DIR-625 (D-Link v3 Firmware)

D-Link - DIR-625 (D-Link v3 Firmware)
 
Port Forwarding Guide
For automatic port forwarding try Simple Port Forwarding

Step 1.

Some routers & modems work best with port forwarding if you have a static local IP.
Manually set your network interface card ( NIC ) to use a static ip address.
You can also download my FREE Simple Static IP tool to set it for you.

Step 2.

Open your favorite web browser and input your routers ip address in the address bar.
Please note that you must have the http:// in order to connect to your router/modem properly.

Need help finding you router IP address? Click here

Step 3.

Some router/modems require a username and/or password, if yours requires it, enter the routers username and password here.

If you have changed it and don't remember it you may have to reset your device to factory default using the reset button on most routers.

Step 4.

Once logged into your router click on "Advanced"

Once the page has loaded click on "Port Forwarding"


Click To View Full Picture

Step 5.

Once the page has loaded be sure to check the box left to "Name" and "IP Address"

Give your entry a name in the "Name" field.

Enter the computers IP address in "IP Address"

In "TCP" enter the starting port to be forwarded.
Example: 2100

In "UDP" enter the ending port to be forwarded.
Example: 3100

Note: You can leave "Schedule" at it's default.

Choose your "Inbound Filter"

Repeat step 5 for any more ports you want to forward.

Click on "Save Settings"

All Done!


Click To View Full Picture

Port Forwarding - D-Link - DIR-280 (D-Link Firmware)

D-Link - DIR-280 (D-Link Firmware)
 
Port Forwarding Guide
For automatic port forwarding try Simple Port Forwarding

Step 1.

Some routers & modems work best with port forwarding if you have a static local IP.
Manually set your network interface card ( NIC ) to use a static ip address.
You can also download my FREE Simple Static IP tool to set it for you.

Step 2.

Open your favorite web browser and input your routers ip address in the address bar.
Please note that you must have the http:// in order to connect to your router/modem properly.

Need help finding you router IP address? Click here

Step 3.

Some router/modems require a username and/or password, if yours requires it, enter the routers username and password here.

If you have changed it and don't remember it you may have to reset your device to factory default using the reset button on most routers.

Step 4.

Once logged into your router click on "Advanced"

Once the page has loaded click on "Port Forwarding"


Click To View Full Picture

Step 5.

Once the page has loaded be sure to check the box left to "Name" and "IP Address"

Give your entry a name in the "Name" field.

Enter the computers IP address in "IP Address"

In "Start" enter the starting port to be forwarded.
Example: 2100

In "End" enter the ending port to be forwarded.
Example: 3100

Choose the "Traffic Type" you want to use.

Repeat step 5 for any more ports you want to forward.

Click on "Save Settings"

All Done!


Click To View Full Picture

Port Forwarding - D-Link - DI-808HV (D-Link Firmware)

D-Link - DI-808HV (D-Link Firmware)
 
Port Forwarding Guide
For automatic port forwarding try Simple Port Forwarding

Step 1.

Some routers & modems work best with port forwarding if you have a static local IP.
Manually set your network interface card ( NIC ) to use a static ip address.
You can also download my FREE Simple Static IP tool to set it for you.

Step 2.

Open your favorite web browser and input your routers ip address in the address bar.
Please note that you must have the http:// in order to connect to your router/modem properly.

Need help finding you router IP address? Click here

Step 3.

Some router/modems require a username and/or password, if yours requires it, enter the routers username and password here.

If you have changed it and don't remember it you may have to reset your device to factory default using the reset button on most routers.

Step 4.

Once logged into your router click on "Advanced"

Once the page has loaded click on "Virtual Server"


Click To View Full Picture

Step 5.

Once the page has loaded check "Enable"

Give your entry a name in the "Name" field.

Enter the computers IP address in "IP Address"

Next choose the "Protocol Type" you want to use.

In "Private Port" enter the starting port to be forwarded.
Example: 2100

In "Public Port" enter the ending port to be forwarded.
Example: 3100

You can leave "Schedule" at it's default.

Click on "Apply"

Repeat step 5 for any more ports you want to forward.

All Done!


Click To View Full Picture

Screenshots - NetGear - CVG834G (NetGear Firmware)

NetGear - CVG834G (NetGear Firmware)

  
Screenshot Database

Some screenshots have small distortions that were used to blur out personal info such as IP addresses and usernames.
(Click on a picture to view its full size.)


Gateway Status

Basic Settings

Wireless Settings

Wireless
Guest Network Settings

Block Sites
 

Set Password

Event Log

DDNS

MAC Filtering

Port Blocking

UPnP

LAN IP

DMZ Host

Port Triggering

Port Forwarding

Screenshots - NetGear - CG814GCMR (Netgear Firmware)

NetGear - CG814GCMR (Netgear Firmware)

  
Screenshot Database

Some screenshots have small distortions that were used to blur out personal info such as IP addresses and usernames.
(Click on a picture to view its full size.)


Basic Settings

Wireless Settings

Gateway Status

Connection Help

Set Password

Backup Settings

Event Log

Ping

Port Blocking

Port Forwarding

Port Triggering

DMZ Host

LAN IP

Remote Management

UPnP

Reboot


Screenshots - NetGear - CBVG834G (Darty Box French Firmware)

NetGear - CBVG834G (Darty Box French Firmware)

  
Screenshot Database

Some screenshots have small distortions that were used to blur out personal info such as IP addresses and usernames.
(Click on a picture to view its full size.)


Screenshots - NetGear - CG814WG (Optus Firmware)

NetGear - CG814WG (Optus Firmware)

  
Screenshot Database

Some screenshots have small distortions that were used to blur out personal info such as IP addresses and usernames.
(Click on a picture to view its full size.)


Gateway Status

Wireless Settings

Signal Status

Set Password

Backup Settings

Event Log

Diagnostics

Port Forwarding

WAN Setup

DDNS

LAN IP

Remote Management

UPnP

Table of Contents


Screenshots - Linksys - RTP300 (Linksys Firmware)

Linksys - RTP300 (Linksys Firmware)


Screenshot Database

Some screenshots have small distortions that were used to blur out personal info such as IP addresses and usernames.
(Click on a picture to view its full size.)


Login

Basic Setup

DDNS Setup

MAC Clone Setup

Advanced Routing Setup

Security - Firewall

Access Restrictions

Applications and Gaming - Port Range Forwarding

Applications and Gaming - Port Triggering

Applications and Gaming - DMZ Settings

Administration - Management

Administration - Log

Administration - Factory Defaults

Administration - Diagnostics

Router Status

Local Network Status

Voice Status

Voice

Screenshots - Linksys - SPA-3102 (Linksys Firmware)

Linksys - SPA-3102 (Linksys Firmware)


Screenshot Database

Some screenshots have small distortions that were used to blur out personal info such as IP addresses and usernames.
(Click on a picture to view its full size.)


Router - Status

WAN Setup

LAN Setup

Router - Applications

Voice - Info

Voice - System

Voice -
SIP

Voice -
Provisioning

Voice -
Regional

Voice - Line
1

Voice -
PSTN Line

Voice - User
1

Voice - PSTN User

Pages

Subscribe to PcWinTech.com™ RSS