CleanMem Features, Help & Information.
By Shane of PcWinTech.com
I will update this page as needed :-)
On this page I will show you all the features and things you can do with CleanMem and its Mini Monitor.
CleanMem is a Free/Pro program.
CleanMem itself is totally free. When you install CleanMem it will auto run
every 15 min by the Windows Task Scheduler. Once installed it is set it and
forget it. Just as it always has been.
You can configure CleanMem to do more advanced things such as ignore lists, only
lists, and log files. These can be set by the CleanMem Settings program in the
start menu.
The Mini Monitor is the only part of CleanMem that is the Free/Pro. All
features in the mini monitor from v1.7.0 are included and still free,
including some new features that where added as well.
The Pro version of the mini monitor is simply extra features, such as tools and
information.
One very important thing is that there are no nag screens in the free version of the mini monitor and no pop ups asking you to upgrade to pro or anything like that. So the free version is still as helpful as it was before and the pro version adds more control and options for the power users.
Now first and foremost. You will notice the settings and windows are very
plain looking. This is by design!
The point of a good monitor is to NOT take anything away from the system, or
take as little as possible to do its job.
Having the settings window all prettied up and such does nothing more than take
more resources and more cpu to draw onscreen.
The mini monitor window has plenty of visual settings to fit the user's visual needs, since it is the part that is on the screen the most. The settings window and such I kept simple.
Sometimes, simple is better. :-)
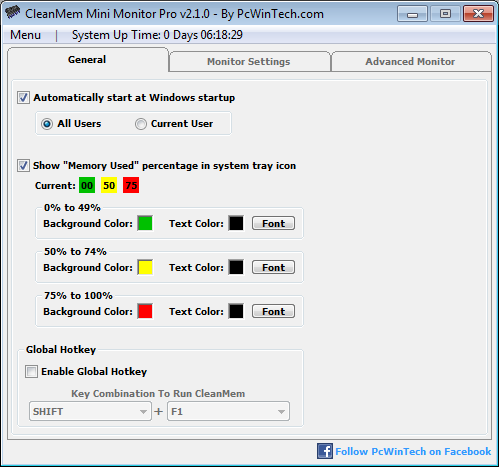
The main window in the mini monitor settings.
Here you can set to have the mini monitor run when Windows starts.
You can also set the tray icon colors and text.
The Global Hotkey allows you to set a key combination to run CleanMem. So now a user can run CleanMem when they like while they are in a game, or doing something and can not or do not want to go to the desktop to click on a shortcut. (This feature was made with gamers in mind)
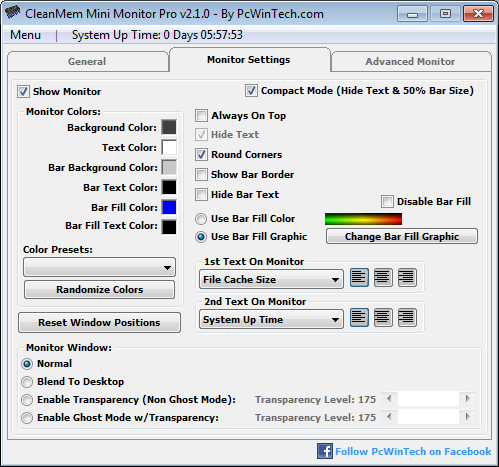
The mini monitor settings.
Here you will have a lot of options for the mini monitor that shows on your
desktop.
Colors, blending, transparency and more.
You can choose to have the monitor not to show at all by the "Show Mini Monitor" check box. You can also control if the mini monitor shows its text, and the text in the bar. You can even set if it has rounded corners and more.
One of the pro features is to choose what text to show on the mini monitor. The free version shows total memory and commit total in the text. The pro version allows a user to choose from an additional 12 options.
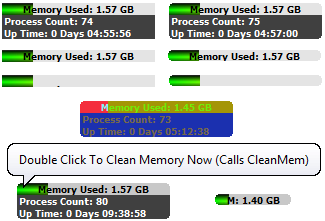
Here is an example of different monitor settings
Another pro feature is to be able to change the bar fill graphic to a custom
made picture of your choice. So users can make their own to use as well. I have
also included a few sample bars with CleanMem.
If you decide to make your own make sure it is 154 x 12 pixels.


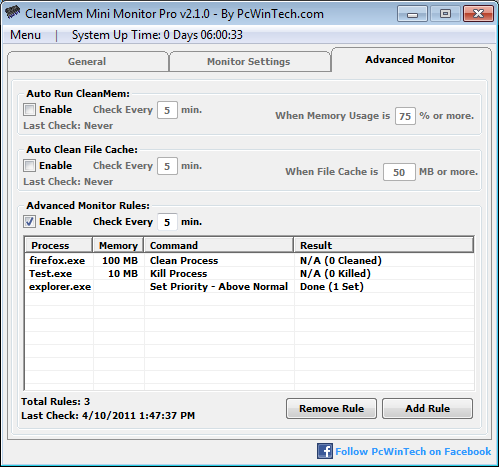
The Advanced Monitor window.
The advanced monitor tab is also a pro feature.
"Auto Run CleanMem"
This will allow a user to have CleanMem run when memory hits a certain level.
This runs separate from the task scheduler. If you're using CleanMem via the task
scheduler then this feature may not be needed. But for users who rather have
CleanMem run only when memory levels are high rather than by the task scheduler will
find this feature to be just what they need.
"Auto Clean File Cache"
The mini monitor can clean the system file cache just like CleanMem can, but now
the user can set to clean the file cache when it hits a certain level.
"Advanced Monitor Rules"
This allows the user to set up to 3 different rules for any process on the
system. These rules run based off the process name and not the process ID (PID) number so if there is more than one instance of a process name, every instance of that process will be affected by the rule.
In the list you will see Process, Memory, Command and Result.
When the advanced monitor cleans a process it will check the CleanMem.ini
settings file, and if you have CleanMem logging enabled, the advanced monitor
will follow those settings as well.
Process: The name of the process to look for. If more than one is
found it does the command to all of them.
Memory: If a process's memory usage is this amount or more
the command will run.
Command: The command to be done.
Result: If it shows "N/A" that means either the process wasn't running, or
was below the memory limit set in the rule. If it says "Done", then it ran the
command on the process. It also shows how many instances of the process were found and how many times
the command was run.
Here is an example of the results for say if you have 3 firefox.exe running.
The command looks at each process, and only runs the command on each process
that is above the memory limit.
So lets say,
Firefox.exe = 90 MB
Firefox.exe = 110 MB
Firefox.exe = 120 MB
The result in the first rule would show "Done (2 Cleaned)"
The reason why it shows only 2 cleaned, is because only 2 of them where above
the 100 MB limit set in the rule. The command did not run on the remaining instance of
firefox.exe since it was below the limit.
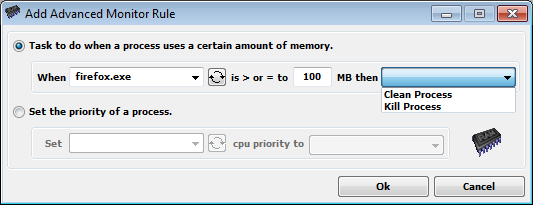
The "Advanced Monitor Rule" gives the user even more control, such as cleaning the memory of a process if it hits a certain level, or to even kill the process.
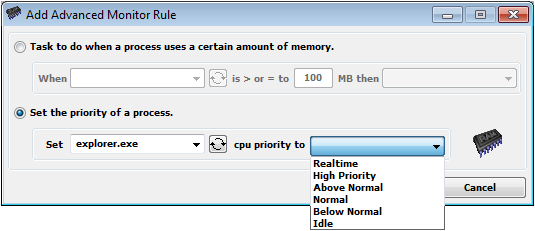
Users can also have the monitor change the cpu priority of a process. This is
useful for users who want a process to run higher or lower than normal and don't
want to have to manually change it in the task manager every time the process
starts. Remember that setting a process to "Realtime" means exactly that.
Also, when the advanced monitor rule cleans the memory of a process it does it itself, it does not call CleanMem. No reason to have another process run. :-)
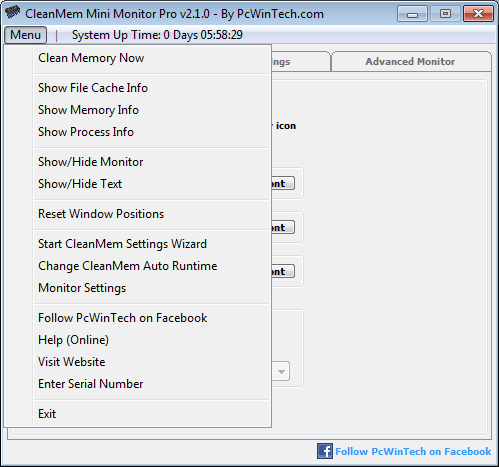
The program menu.
Users can also right click on the mini monitor or the system tray icon to open the menu as well.
The menu gives you 3 new pro features.
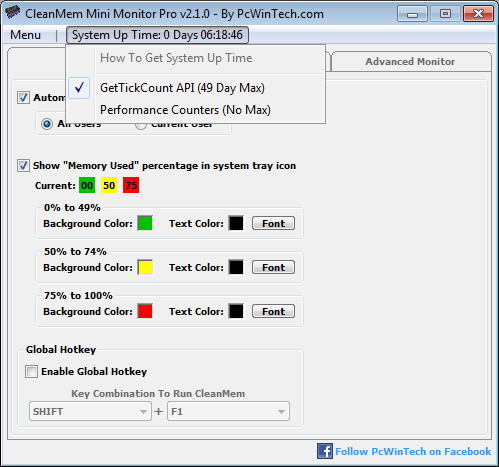
The System Up Time menu.
A user can decide how the program will pull the system up time.
Default is GetTickCount API (49 Days Max) the other is by the Windows
Performance Counters (No Max). The reason for the 2 options is for users who
have disabled their performance counters and do not wish to turn them back on.
GetTickCount counts since system boot and includes suspends/hibernation time
as well, but has the limit of going up to 49 days.
The performance counter only counts as windows is running and doesn't during
suspends/hibernation, but doesn't have the 49 day limit.
"Show File Cache Info"
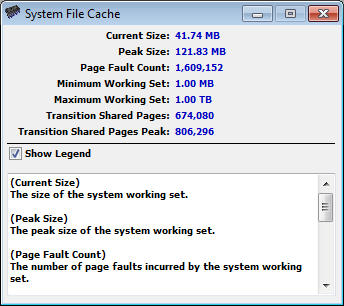
This gives current info of the system file cache.
"Show Memory Info"
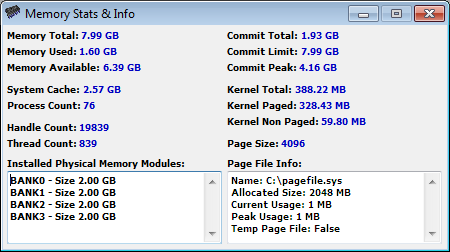
This window will give you more advanced information about the system's memory usage, including the installed memory modules ("memory sticks") and page file info. (The current screen shot doesn't show page file info because my page file is disabled on my system.)
"Show Process Info"
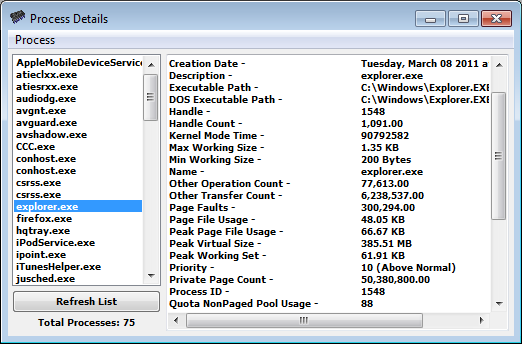
This window will allow you to pull a ton of details on a running process.
That's it so far. Lots of options and things can be done with the mini monitor.
Have any questions, feed back, ideas, or need support?
Just drop us a line in the forums.
Take care!
-Shane

